# Preparing still images
If you're working with regular video clips in the same aspect ratio as your canvas, you won't have any problems. You also probably won't have any problems if you're working in a different aspect ratio, and have set Spatial Conform to Fill. If that's your plan, skip straight to the next section!
However, there's a specific situation, common in animation, which requires some special treatment. Because effects can only act on the clip they've been applied to, they are limited to the size of the frame the image takes up. It's not possible to move an image outside that area — it just clips off at the original border. Setting Spatial Conform to Fill does solve this problem, but can cause quality issues, as it can mean the image is scaled down and then scaled back up in some contexts.
**All effects, even built-in FCP effects like Radial Blur, have this issue.**
To avoid issues, make you to work with clips that:
1. Match the size of the canvas
2. Have transparent areas around the actual image data
There are a few easy ways to do this.
The standard workflow for many animation effects is to **place each element in a compound clip**, and that works here too. You can select any smaller elements and place them in a compound clip before applying Keyframe Toolbox. However, this can introduce some complexity around the sizing of compound clips and can get messy if you ever need to change the duration of a compound clip.
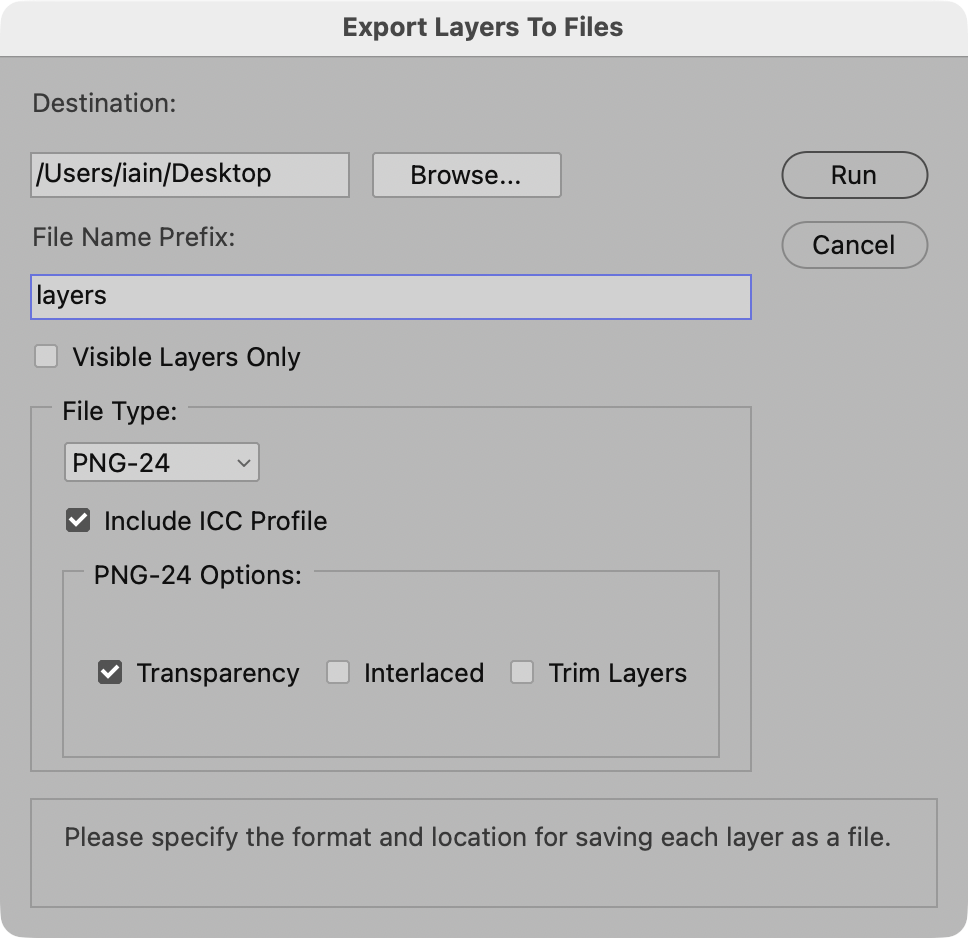
Alternatively, **If you use Adobe Photoshop** to prepare your images:
1. Set your image size to match your FCP timeline size.
2. Use File > Export > Export Layers to Files, choosing PNG-24 as the format, checking Transparency, and unchecking "Trim Layers".
You can now bring in all the exported PNG files and animate them safely.
If you don't use Photoshop, we've added a feature into Keyframe Toolbox itself. It pads any still image with extra space, making it the same aspect ratio as the timeline the effect is placed in. This means you won't need to change Spatial Conform before applying Keyframe Toolbox, and you won't hit any scaling quality problems.
To use it, you'll need to have applied Keyframe Toolbox to a clip in your timeline — even on a temporary clip. With that in place, drag an image from the Browser to the logo at the top of the effect. (This image will need to be in the same Event as your current Project, due to how FCP works. Also note that if you have multiple versions of FCP installed, this process can unfortunately fail.)
Keyframe Toolbox will then send the new image back to a new event called "images with padding". The new image also has its new resolution as part of its name. You can now add this image to your timeline instead of your original image.
Here's a video explaining how this (optional) feature works.